In my previous blog post I introduced Azure Automation and Runbooks and showed how to automate index maintenance using these Azure technologies. This blog post is the second in the series and discusses and illustrates how to automate index maintenance, but this time using Azure Functions.
What are Azure Functions?
Just as I did in my last blog post, let me begin by stating that this isn’t a deep dive into Azure Functions. We could do a whole series of posts just on Azure Functions itself, but for the purposes of this blog, I’ll do a brief introduction and summary simply to lay the appropriate foundation for this blog.
Azure Functions is an Azure serverless solution that provides compute on demand. The goal with Azure Functions is to provide a platform the enables you to write less code and deploy that code without maintaining a lot of infrastructure, all while supporting the demand needs. In other words, you write and deploy the code, Azure takes care of everything else. As incoming requests increase, Azure Functions automatically scales to meet the demand, and then as requests decrease, so do the resources.
Azure Functions offers different hosting plans, so you will want to become familiar with those if you are planning on using this service. There are three hosting plans:
- Consumption – Instances of Azure Functions are dynamically added and removed based on the number of incoming requests/events.
- Premium – A dynamic scale hosting option that provides additional benefits for your functions.
- Dedicated (App Service) – Defines a set of dedicated resources for an app to run.
You can read more about the different hosting options here.
There are wide number of different scenarios in which to use Azure Functions, including processing data in real time, analyzing IoT data, building serverless workflows, and the topic which will be covering today, running scheduled tasks.
Obviously, there is much more to azure Function, but this should be enough to get us started, so with this foundation, let’s build an Azure Function to optimize indexes.
Getting Started
To get started, there are several things we need:
- An Azure SQL database
- Scripts to do the index optimize
- Visual Studio
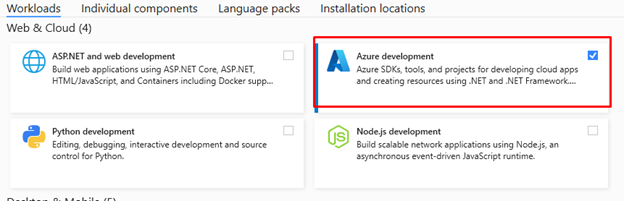
For Visual Studio, you will need the Azure Development components to get the Azure Function tools. Run the Visual Studio installer if needed and select the Azure Development component.
Create the Database
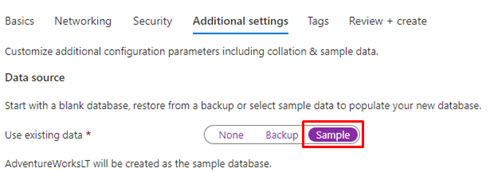
I discussed this process in the previous blog, but in case you didn’t read that one, I’ll walk through this again. For this demo, I simply created a new General Purpose database, based off of the Sample database. For the purposes of this blog, no other configuration is needed.
Run the Scripts
With the database selected, the next step is to add the appropriate components to the database to do the index optimization. We at SSG are a huge fan of Ola Hallengren and his Maintenance Solution, and you can get his awesome scripts here.
The IndexOptimize.sql script will run in Azure, but you will also need to download the CommandLog.sql file as well. Run both of those in the database you created.
Create the Azure Function App
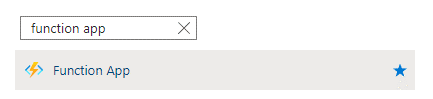
With everything prepared, the next step is to create the Azure Function App. In the Azure Portal, type “Function App” in the search bar and select Function App.
Click + Create.
There are a few things you will need select and fill out on most of the tabs, so we’ll walk through those.
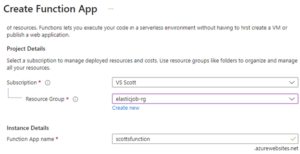
Basics
In the Basics tab of the Create Function App, select the Subscription and Resource group, then provide an account name and region.
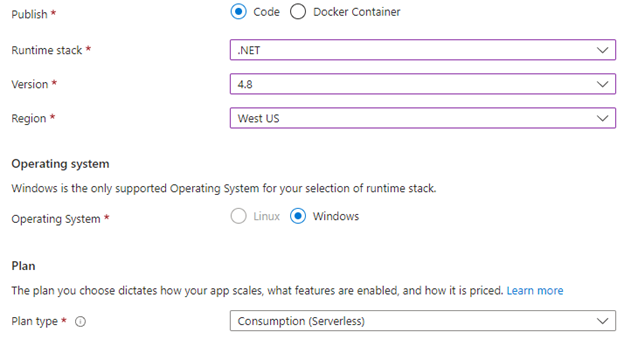
Additionally, you will need to indicate what you are publishing (in this case, some code), the runtime stack (I’m using .NET), the .NET version, and the region in which you want to create this Function App.
Lastly, select the operating system (due to my selections, only Windows is supported), and then select the plan type.
Hosting
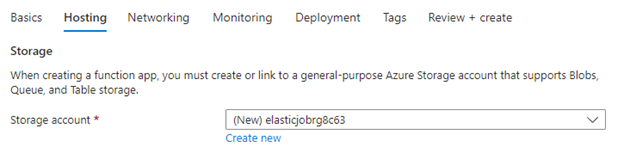
Select the Hosting tab, and either select an existing storage account or create a new one.
Networking
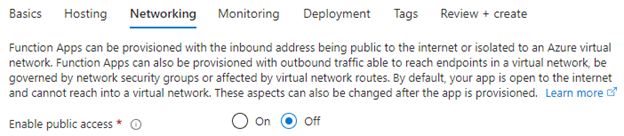
On the Networking tab, select Off for Enable public access. Since this is running within Azure and you aren’t accessing from outside of Azure, there is no need to enable public access.
Monitoring
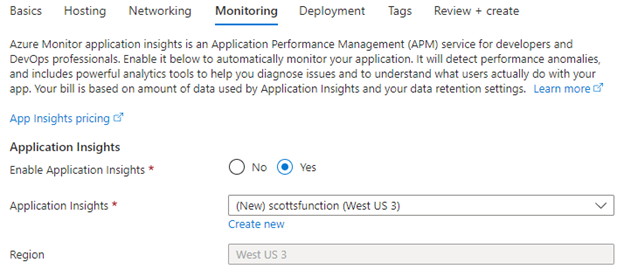
On the monitoring tab, select to either enable or disable Application Insights. Application Insights provides performance monitoring for your application by collecting metrics and telemetry data and storing those in a blob storage account. You can then view this information as a way to see how your application is doing. The more you work with Azure Functions (and Azure in general), it might be worth enabling this. As you are testing, you could probably leave it off.
Deployment
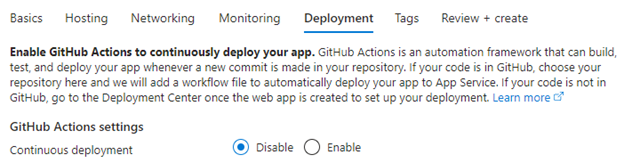
Unless you are doing any type of source control for your code with GitHub, leave the continuous deployment disabled. As you start doing more with Azure Functions, you might consider turning this on and doing more with source control and continuous deployment.
Don’t worry about anything on the other tabs. Click Review + Create to create the Function App. At this point you have the basis to start automating, and we’ll do that with Visual Studio.
Create the Azure Function
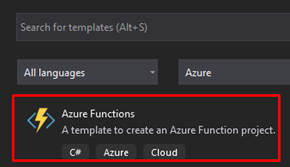
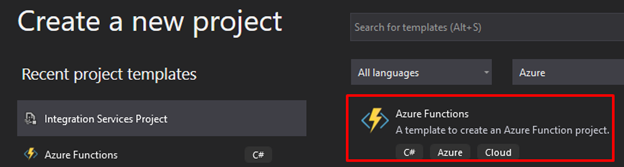
The next step is to create the function to run the index maintenance. Fire up Visual Studio and create a new project. Search for Azure Functions and select the Azure Functions project type, then click Next.
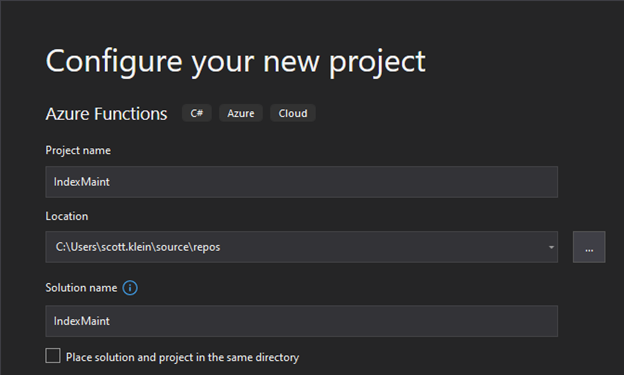
Give your project a name, and then click Next.
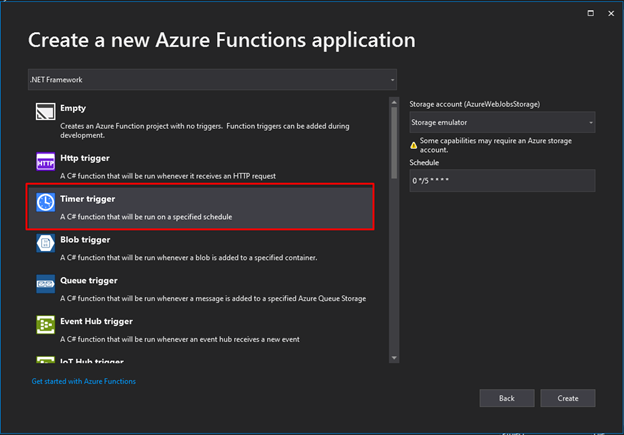
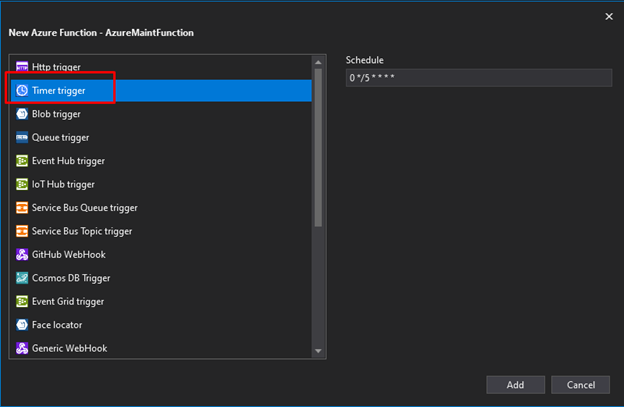
This next step is an important one, as you are asked to select what type of Azure Function application you want to create. As you can see in the following image, there are a lot of different types. Since we want to run our index maintenance on a schedule, select the Timer Trigger.
You are probably asking how the timer or schedule is defined. In the following screenshot you can see a schedule to the right with some funky format. Don’t worry, I’ll get to that shortly, so for now just click Create.
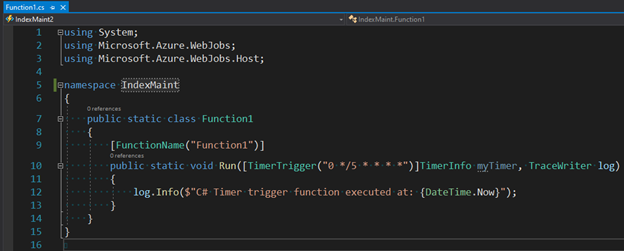
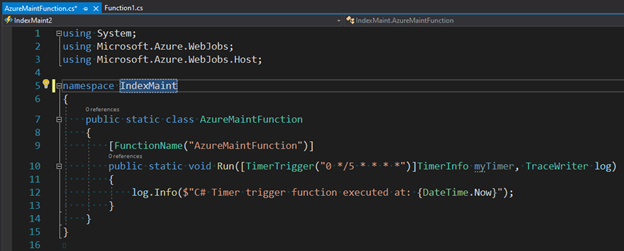
The project will be created and a default function will be added, as shown in the following screenshot.
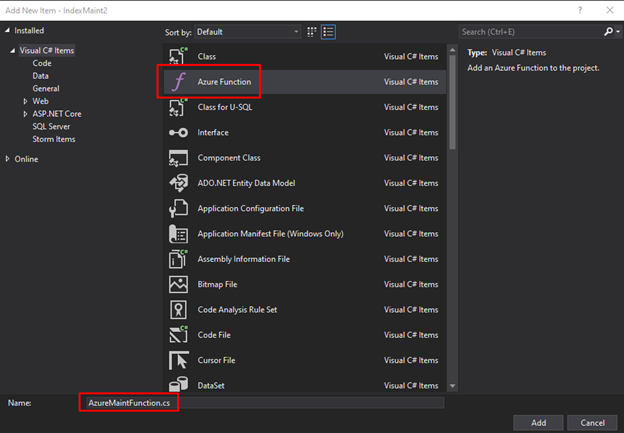
For clarity, delete Function1 from the project, then right click the project and select Add -> New Azure Function. In the Add New Item dialog select Azure Function and name it AzureMaintFunction. Click Add.
For the type, select Timer trigger, leave the schedule format as is (I’ll get to that shortly) and click Add.
Now we have a project and function with a meaningful name. 😊
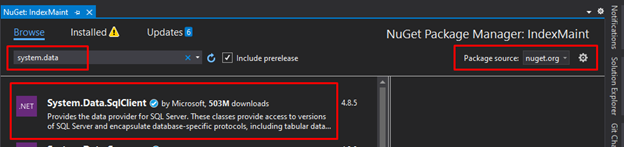
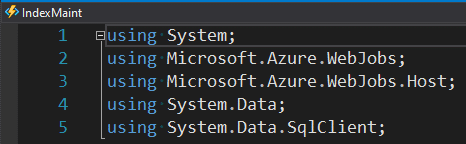
OK, since the function is accessing a SQL database, the next step is to add the appropriate dependencies. Click on the Project menu, then select Manage NuGet packages. In the NuGet Package Manager, select nuget.org as the Package source, then search for system.data and select the System.Data.SqlClient package and click install.
Once it is installed, add System.Data and System.Data.SqlClient references to the type of the Function.
Finally, it is time to add some code to your function. Copy and paste the following code into the Run method of the function, below the log.Info line.
There are a few values you will need to replace in the code. Replace <server> with the actual name of your Azure SQL Database server, replace <user> with the username, then replace <pwd> with the password.


USING (VAR conn = NEW SqlConnection("Server=tcp:<server>.database.windows.net,1433;Initial Catalog=database4;Persist Security Info=False;User ID=<user>;Password=<pwd>;MultipleActiveResultSets=False;Encrypt=True;TrustServerCertificate=False;Connection Timeout=3600;"))

{

try

{

SqlCommand cmd = NEW SqlCommand();

cmd.CommandText = "IndexOptimize";

cmd.PARAMETERS.ADD("@Databases", SqlDbType.NVARCHAR);

cmd.PARAMETERS["@Databases"].VALUE = "USER_DATABASES";

cmd.PARAMETERS.ADD("@UpdateStatistics", SqlDbType.NVARCHAR);

cmd.PARAMETERS["@UpdateStatistics"].VALUE = "ALL";

cmd.PARAMETERS.ADD("@LogToTable", SqlDbType.NVARCHAR);

cmd.PARAMETERS["@LogToTable"].VALUE = "Y";

cmd.CommandType = CommandType.StoredProcedure;

cmd.CONNECTION = conn;

conn.OPEN();

cmd.ExecuteNonQuery();

}

catch (EXCEPTION ex)

{

LOG.Info(ex.Message);

}

}
Before moving on, I’ll explain what this code does. First, this defines a connection to the Azure SQL Database. A critical piece of the connection string is the Connection Timeout. This is critical to remember, as it is standard .NET stuff. As I explained in the previous blog post, if the IndexOptimize stored procedure does NOT complete before the timeout period is reached, it will time out and roll back the item it is currently working on.
Unlike PowerShell, the SQLConnection has a default timeout, so even if you omit the Connection Timeout parameter, it will still timeout after the default time. So for Azure Functions, you will need to know roughly how long the index optimize will take and set the timeout appropriately.
The rest of the code defines the parameters being passed to the IndexOptimize stored procedure, then opens the connection and executes the query.
OK, let’s discuss the timer trigger. Azure Functions timer trigger uses the NCronTab library which is super similar to the CRON expressions. The difference is that the NCronTab library uses an additional sixth field at the beginning for a time precision in seconds.
Thus, the format looks like this:
{second} {minute} {hour} {day} {month} {year}
You can read more about Azure Function timer triggers here, and NCrontab for .NET here.
So, the default timer essentially has the function firing 12 times an hour, or at second 0 of every 5th minute of every hour each day. Not what we want.

For simplicity, I just want my function to fire every day at 10pm, Monday through Saturday (day 0 is Sunday). So, I change the timer as follows:

Thus, it will automatically fire Monday through Saturday at 10pm.
Deploy the Function
The next step is to Deploy the function. First, build the project to ensure it compiles, then right click the Project and select Publish.
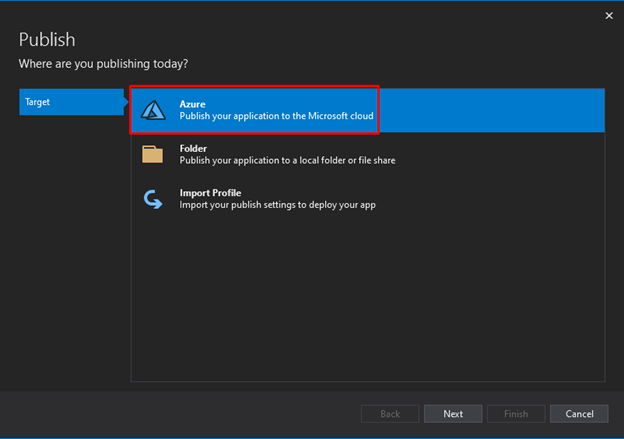
In the Publish dialog, select Azure.
If prompted to sign in, do so.
Lastly, select the subscription if not already populated, then in the Function Apps area, select the Function App you created earlier, then click Finish.

The Function will be published and after a few minutes you will be informed that the publish has, hopefully, been successful.
You can tell the history of the events, or runs, of the functions by looking in the Azure portal at your Azure Function and looking at the Monitor.
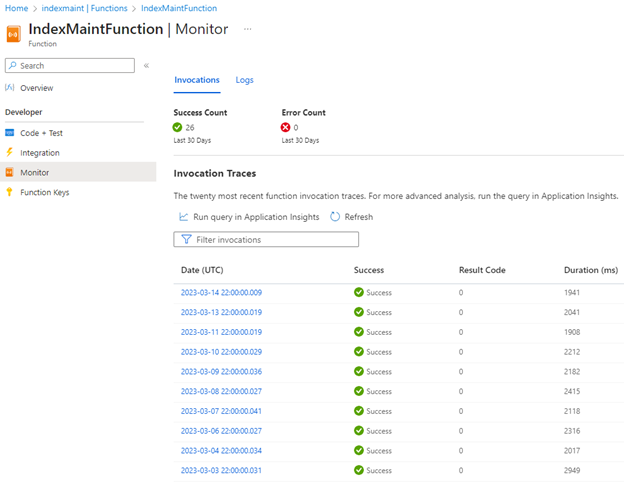
And there you have it, you have successfully created an Azure Function to automate your SQL index maintenance.
Pros and Cons
Having worked with this for a while, there are some things that I want to highlight in terms of what I liked and some areas that could be better.
In the “pros” category, I like that you can do this right in Visual Studio (or even VSCode), and the Azure Functions template make it super easy to use and work with Azure Functions. Sweet. It was also pretty easy to publish the function. Very sweet.
I haven’t tested it yet but since it is standard .NET I’m hoping you can “obfuscate” critical variables, such as username and passwords by putting them in an app.config.
For the downsides, just like Azure Automation and Runbooks, it is “per database”, meaning, even though the query says “User Databases” (if you are familiar with Ola’s scripts), it is ONLY going to run the index optimize against the database specified in the parameter. That is just a limitation of Azure, not the Runbook. Thus, if you want to optimize indexes against multiple databases, you need multiple Functions or modify the one function to connect to multiple databases. This can get kinda messy.
CRON Expressions. Ugh. Once you work with them a bit it gets easier, but I had to do a lot of reading just to get started with them.
Summary
This blog post just touches the surface of what Azure Functions can do, but we often see companies not doing index maintenance in Azure because either they don’t know how to do it or it is too difficult. Hopefully this will help get people going.
In the next two blog posts I’ll show how to do the same thing using Azure Elastic Jobs.


This Post Has One Comment
Pingback: Index Maintenance: Automating Azure with Elastic Jobs | SQL Solutions Group
Comments are closed.