There is a great feature in SQL Server Management Studio that I do not see used very often, and that feature is the SQL Server Solution Project. SQL Server Solution Project has been around since SQL Server 2005 and is based on the framework from Visual Studio. A Solution is made up of one or more projects and are organized similarly to a .Net Solution in Visual Studio.
SQL Server Solution Project is rather straightforward to use and allows developers to organize their code and templates into projects that are easily accessible within the viewing panes of SSMS. How many times have you been frustrated when having to fish for a stored procedure in a random folder that has 75 other stored procedures in it? Imagine instead just double clicking on a stored procedure in a pane and it can be brought up seamlessly in the query analyzer, ready to be modified. Let’s create a simple solution to see how the SQL Server Solution Project works and if it could be a good fit in your development environment.
Before we create the solution, create a directory where the solution will be stored. Create the directory “C:\MSSQL\Code\” and we will save our Project there along with any scripts that are written. One way to do this leveraging T-SQL would be to open a SSMS query window and type the following command.
EXECUTE sys.xp_create_subdir ‘C:\MSSQL\Code\’
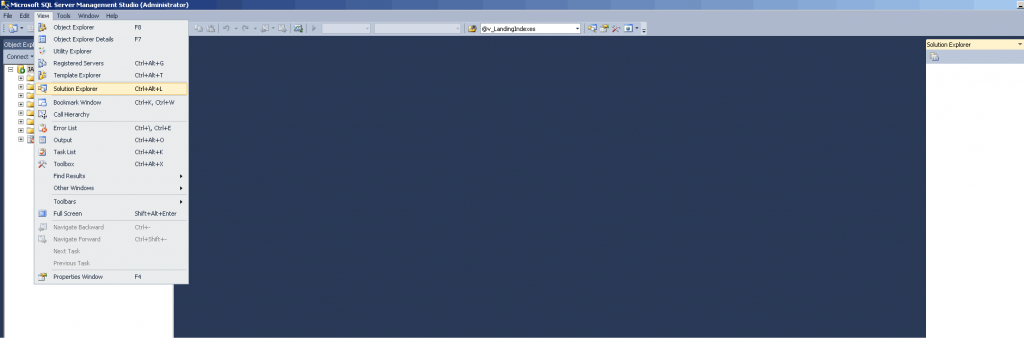
Next, let’s bring up the solution explorer, so open SSMS and left click on view at the top menu, and then left click on “Solution Explorer”/ or press Ctrl+Alt+L.
Now there will be a pane on the right side of SSMS (this is the default view and can be changed for personal preference; for now leave it in its default position). Next, let’s create a Solution.
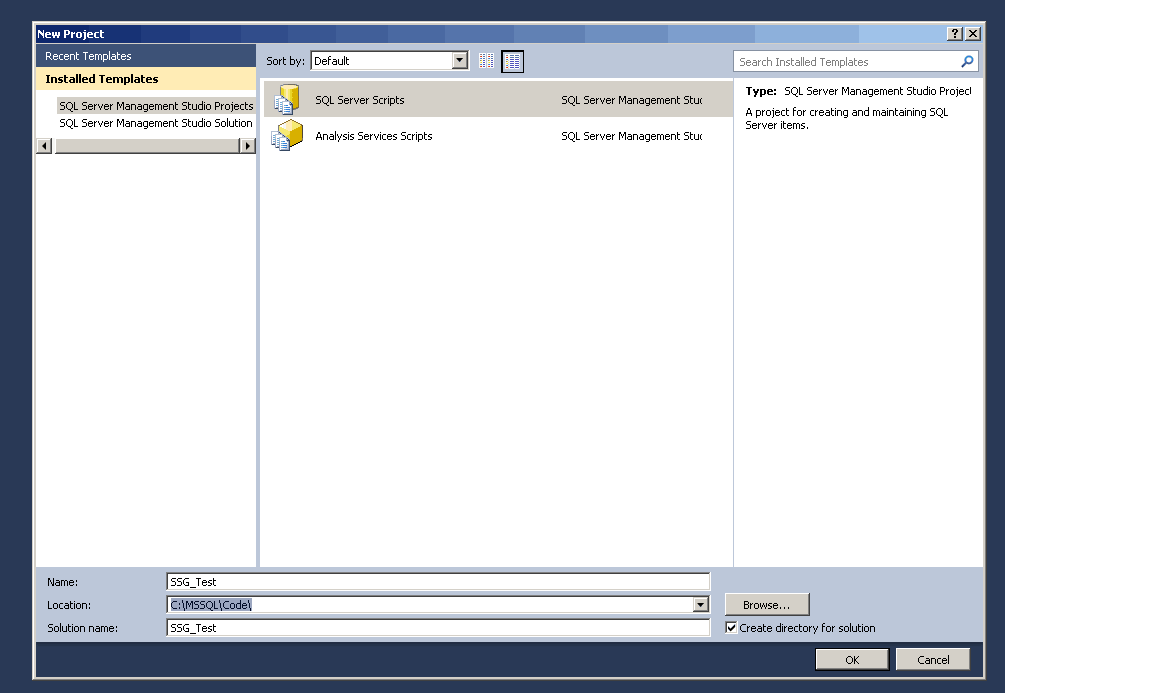
Next we will go to SSMS and left click “File” from the top menu and hoover over the new drop-down menu which will allow us to then left click the “Project” menu item. This action will bring up the “New Project” window. At the bottom there are three boxes that will allow us to continue the configuration. The first is “Name”, and the default text in the text box will be “SQL Server Scripts.” We are going to change this to SSG_Test (SQL Solutions Group Test).
Notice that when we do this it changes the solution name to SSG_Test as well. This is a good thing and we will leave that alone, but we will change the location by clicking on the Browse button to the right of the drop down box of location and browse to C:\MSSQL\Code\ directory that we just created. Once the three text boxes look like the illustration below then left click “ok” to create the solution.
Now we will see the SSG_Test Solution, and a single project called SSG_Test will be in the solution Employer.
In the SSG_Test Project, right click on “Queries” and then left click on “New Query.” This will first create a connection manager for the project, and it will create the query called SQLQuery1 by default. We will use this to create tables and after some random test tables we would click “File”, “save SQLQuery1 as…” and we would then change the name to “tbls” which would change the query name in the SSG_Test project as well.
We can continue to add to this project by adding scripts to populate the base data-driven tables, functions to support the base framework, and whatever else you want to put in the root project of the solution. Next we will create another solution to put the stored procedures of the base functionality, so place your mouse over the SSG_Test solution (it is the very top item in the solution explorer) and then right click, which will bring up a drop-down menu, choose “New” and then left click “Project” to create a new project.
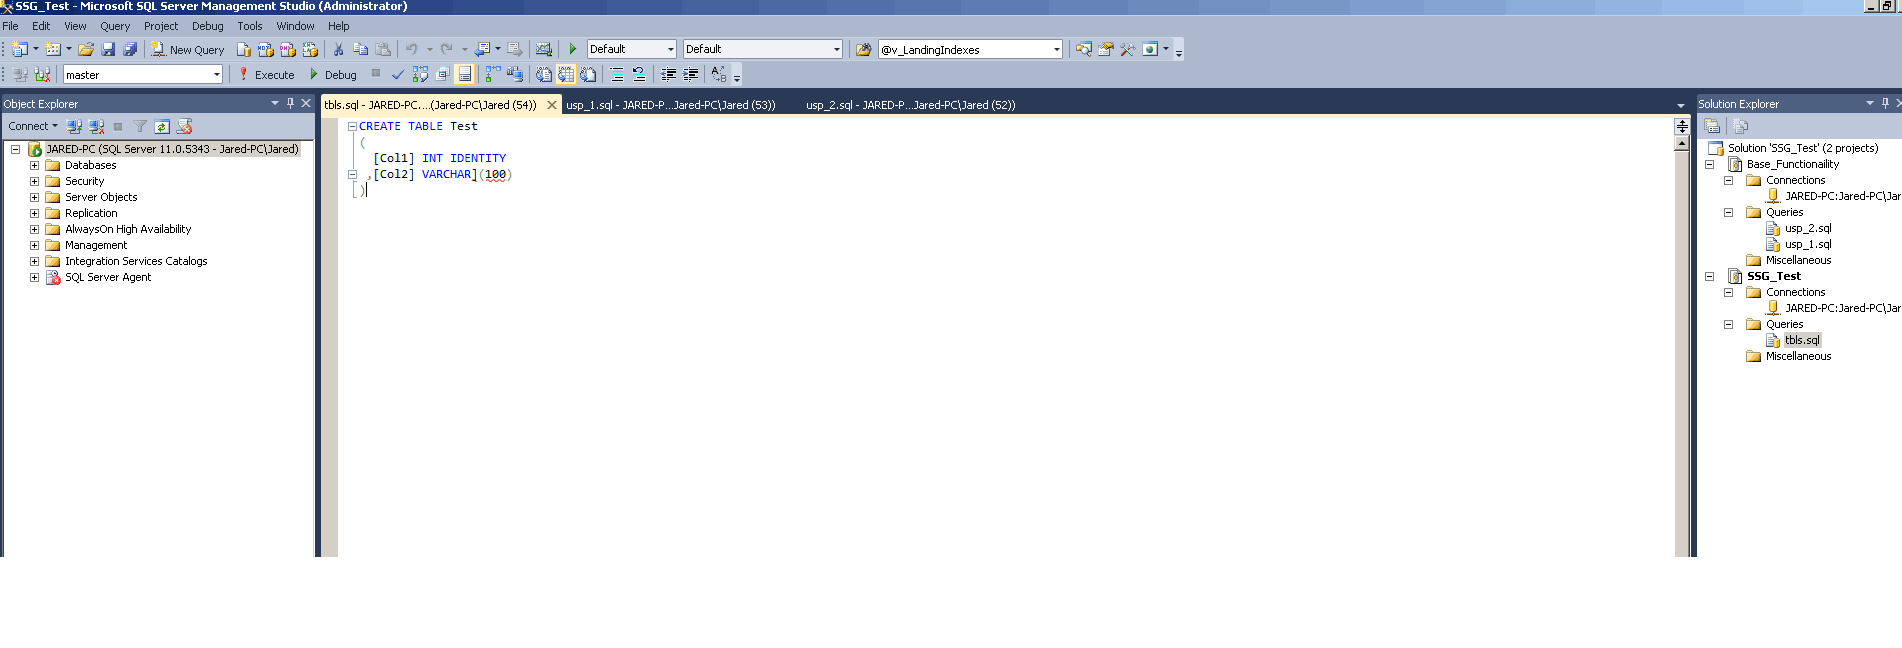
This will bring up the “New Project” window, which will default to SQL Server Scripts, so change the name to “Base_Functionality” and click “ok.” Once we have a new project we will create two queries in the project called “usp_1” and “usp_2” to simulate writing stored procedures for our base framework we are creating here in test. The Solution explorer should now look like the illustration below:
We have now created a solution and two projects. In the first project, we organize our DDL code and the second project we store our stored procedures for the base functionality of the test. When we are ready to start developing new functionality, we can create a new project so that we can segregate it and organize it accordingly. Even though this is a very small theoretical solution, you should be able to see the value of having all of your developing code a double-click away on the right-hand side.
Remember to “Save all” (do not just save the queries but “Save All” so that it saves the solution and project files too). You can go to C:\MSSQL\Code and copy the SSG_Test directory to wherever you want the files, to a remote disaster recovery folder, where other developers can use your solution, or just have a local version.
One Caveat with SQL Server Solution Project
Along with anything good there is one frustrating part of the Solution Explorer. If you copy the directory and you open the solution on another SQL Server, each of the connections for every single project is still held from the last save, which will be a different computer connection string. The only thing that can be done is to remove all the connection strings from all the projects and then save the solution. This is a lot a tedious work if you have 20+ plus projects because they have to be removed one project at a time.
Overall SQL Server Solution Project is a great tool to organize your code and have it within the SSMS environment that can be brought up with a double-click inside the windows frame solution explorer box. It is a tool that I have not seen used very much so we also have not seen many features added. I’m definitely hoping for changes with new versions of SQL Server in the future as it has the possibilities to be a powerful tool in the SQL toolbox.


