
As consultants, we often see system databases existing on the C drive on SQL Servers. There are some issues with this setup, and the biggest is: if one of your system databases grows and fills your C drive, you will likely crash the OS. If that happens, we’re in big trouble. Therefore, moving system databases becomes a necessary operation at times.
This is such a common issue because the default locations are set to C for these databases and that’s where they end up on fresh installs 99% of the time. Don’t worry! If you’re in this situation you’re not alone.
Not sure? Let’s check if you have this problem:


SELECT

db.name AS database_name,

mf.name AS logical_name,

mf.physical_name AS file_path,

LEFT(mf.physical_name, 3) AS drive,

mf.type_desc AS file_type,

CAST(mf.SIZE * 8.0 / 1024 AS DECIMAL(10,2)) AS size_mb

FROM sys.master_files mf

JOIN sys.databases db ON db.database_id = mf.database_id

WHERE db.database_id <= 4 -- system databases: master, tempdb, model, msdb

ORDER BY db.name, mf.type_desc;
The output will look something like this. As you can see, this server has all system databases on C:
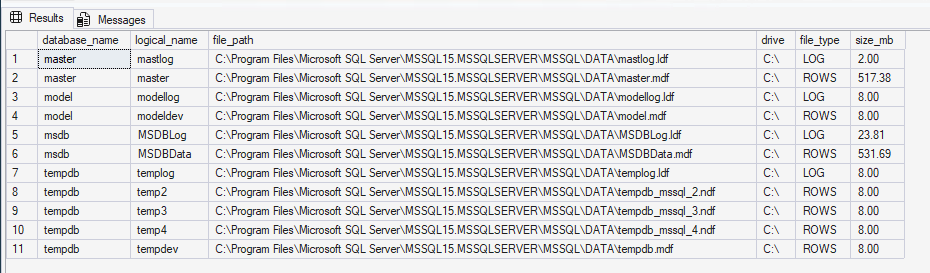
So let’s go ahead and fix this.
This process can be scary the first handful of times you do it. But don’t worry! As long as we prepare properly we shouldn’t have any problems and it’ll go smooth as butter.
One very important thing to note is that fixing this will require turning off the SQL Server instance so none of your databases will be available while we do this. You’ll definitely need to do this during a maintenance window.
How to fix?
On my server I have this drive layout. Please note your specific setup.
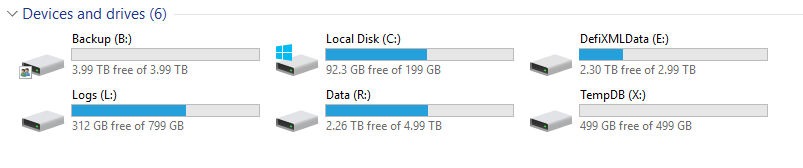
Our starting recommendation is to have three separate drives for database files: A data drive, a log file drive and a drive for tempdb. The last one is important because tempdb is an absolute spaghetti mess internally and deals with all of the stuff on your server that the other databases don’t want to deal with. It tends to be the most busy drive so we want to separate it from our other databases. Otherwise there will be arguments, like a house full of cats.
Considering the layout I have here (in above image), I’m going to move my tempdb files to the X drive, the other .mdf (data) files are going to R and the .ldf (log) files are going to L.
SQL Account server permissions
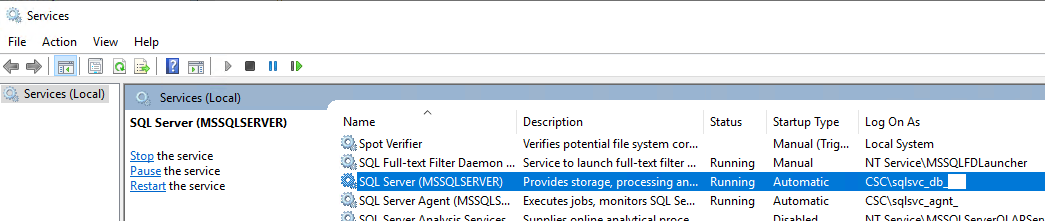
One very important thing is to check the SQL Service account has access to the file locations that we’re moving to. Note: This is not your account, this is the SQL Account. You can check this in configuration manager or in the services app:
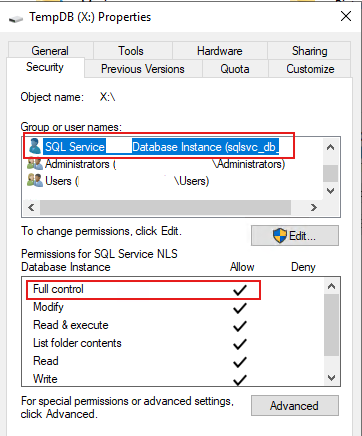
We want to navigate to the Windows folder and ensure that this account has full control of the folder. It’ll need to read/write and also create new database files.
If you try starting the instance and you haven’t done this, you’ll get errors like this in the log:

Skip this step at your peril!
Moving the Master
The master database is different to all other databases as you can’t move this with an ALTER DATABASE command; it has to be done in SQL Server Configuration Manager.
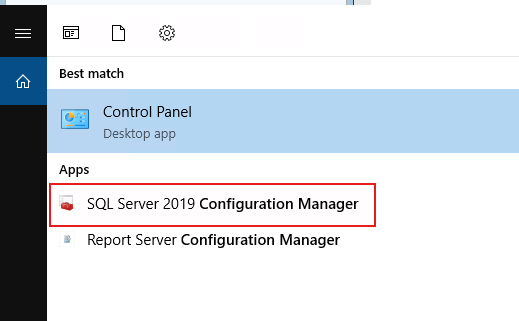
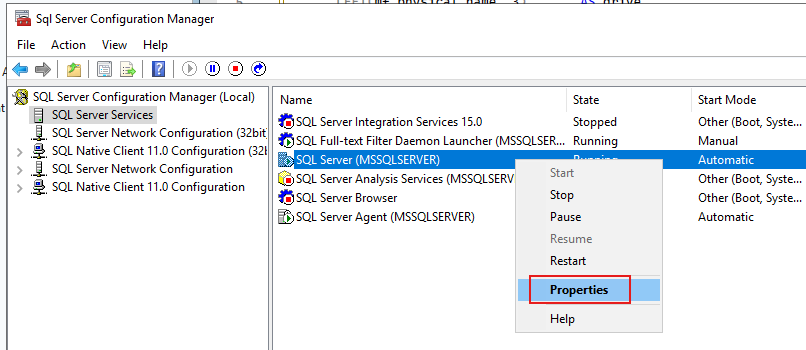
Once you have the config manager open, navigate to SQL Server Services -> SQL Server -> right click and choose Properties:
In here, navigate to our startup parameters. We’ll have at least three options (there may be more), and these are the three we care about for this process:
- -d: This is the master.mdf (data) file location
- -l: This is the master.ldf (log) file location
- -e: This is the SQL Server error log output location. We will not be changing this but definitely take a note of this location. If, at the end of this process, the SQL Server refuses to start up, we’ll want to dig into the log files here to find out what’s happening.
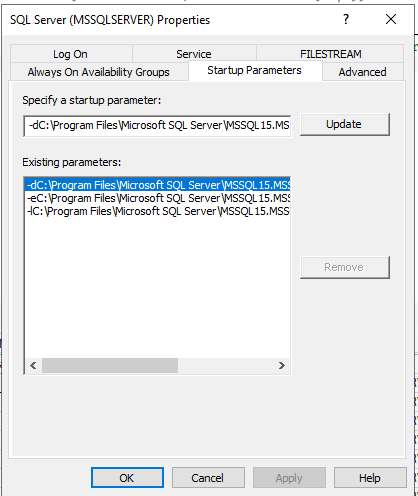
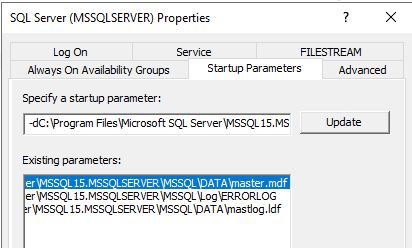
To tell SQL Server where we want to move master to, you’ll want to change the file locations to your new filepath by highlighting it and changing the file path from within the “Specify a startup parameter” window and hitting Update. Once you’ve done both file locations and they reflect the new locations in the ‘Existing Parameters’ window, we’re golden.
Once you save you’ll get this window:

This is important to understand. We haven’t moved anything yet, we’ve just told SQL Server where they will be. Remember, these are startup parameters so that’s when the check will be run for the location.
Other System Databases: msdb, model, tempdb
These ones we can do from within SSMS, so let’s take the query below, replace the parameters with your new filepaths, and hit execute. This won’t do anything other than create the scripts. You’ll have to execute them manually (don’t worry!).
DECLARE @NewDataFilepath NVARCHAR(4000) = 'R:\'

,@NewLogFilepath nvarchar(4000) = 'L:\'

,@NewTempdbFilepath nvarchar(4000) = 'X:\'

SELECT

db.name AS database_name,

mf.name AS logical_name,

mf.physical_name AS file_path,

mf.type_desc AS file_type,

CASE WHEN db.name = 'tempdb' THEN 'ALTER DATABASE [' + db.name + '] MODIFY FILE (NAME = ' + mf.name + ', FILENAME = ''' + @NewTempdbFilepath + REVERSE(LEFT(REVERSE(mf.physical_name), CHARINDEX('\', REVERSE(mf.physical_name)) - 1)) + ''' )'

WHEN mf.type_desc = 'ROWS' THEN 'ALTER DATABASE [' + db.name + '] MODIFY FILE (NAME = ' + mf.name + ', FILENAME = ''' + @NewDataFilepath + REVERSE(LEFT(REVERSE(mf.physical_name), CHARINDEX('\', REVERSE(mf.physical_name)) - 1)) + ''' )'

WHEN mf.type_desc = 'LOG' THEN 'ALTER DATABASE [' + db.name + '] MODIFY FILE (NAME = ' + mf.name + ', FILENAME = ''' + @NewLogFilepath + REVERSE(LEFT(REVERSE(mf.physical_name), CHARINDEX('\', REVERSE(mf.physical_name)) - 1)) + ''' )'

END AS AlterDatabaseCommand

FROM sys.master_files mf

JOIN sys.databases db ON db.database_id = mf.database_id

WHERE db.database_id <= 4 -- system databases: master, tempdb, model, msdb

AND db.name <> 'master'

ORDER BY db.name, mf.type_desc;
The output will look something like this:

The very important part here is to ensure the new file locations match the actual new locations exactly otherwise you’re going to take your server down and not be able to get it back online.
Once you’re sure the locations are correct, copy the AlterDatabaseCommand column into a new query window, check the new filepaths thoroughly again, and then hit execute. You’ll get a message similar to this in the messages result window:

Once we’ve done this, we’ve told SQL Server the new file locations for our system databases.
Stopping the instance and moving files
Now that we’ve told SQL the new file locations, we need to go ahead and actually move the files. To do that, we’ll need the SQL Server instance to be stopped. Otherwise, the files will be locked (and remember, these are startup parameters)
Head back into configuration manager, find the SQL Server and hit ‘Stop’:
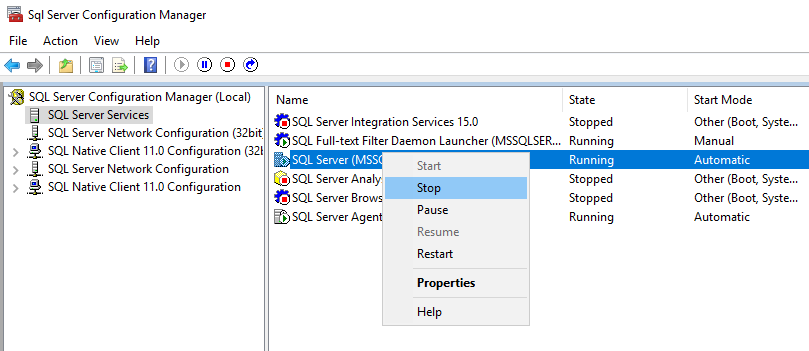
You’ll also have to give the go ahead to stop related services:
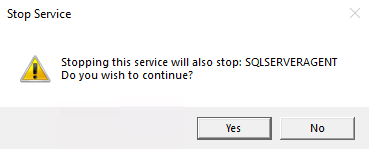
Moving the Database Files
From this point you can actually move all of our database files to the new file locations in Windows. Go ahead and move the master, model and msdb data and log files to the new locations.
You don’t need to move any of the tempdb files. These are created automatically when the SQL instance starts up so the old ones will no longer be used. As a best practice, you should delete your old tempdb files if they still exist in order to reclaim the disk space.
Remember to enable ‘View file name extensions’ in Windows Explorer so you are sure which file you’re moving to which location.
Starting SQL Server
At this point we need to restart the service, head back to configuration manager, and start the SQL Server service:
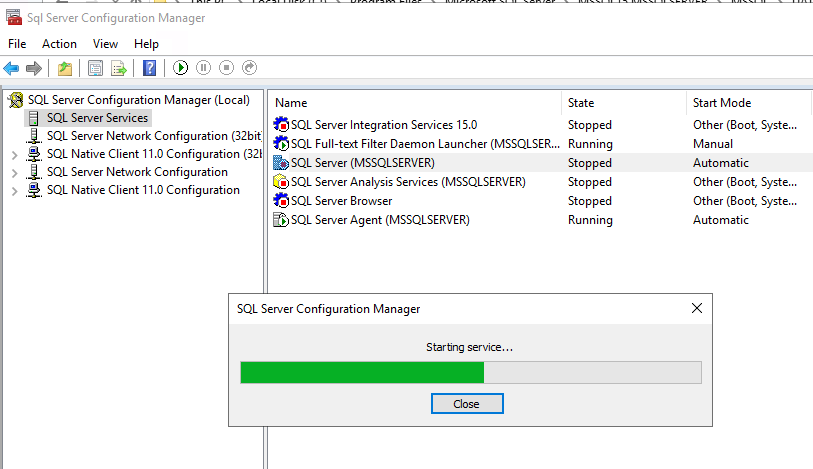
Hopefully you’ll see this screen with the services running as planned:
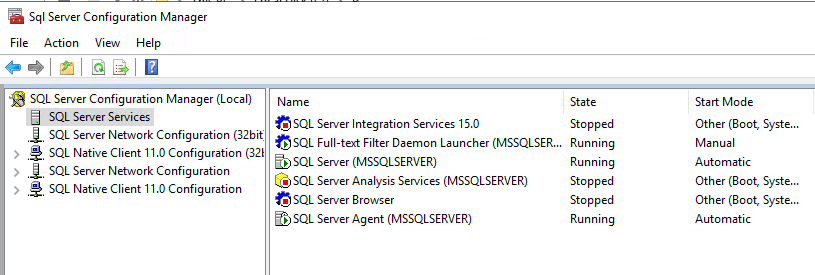
Remember to manually start any services (cough SQL Server Agent cough) that we had to shut down in order to stop the SQL Server service.
As long as they all start you’re golden, you can skip down to the bottom of this article to run our final checks.
SQL Server Start Failing
If SQL won’t start, don’t worry, we can fix that!
Go to the log file location from the beginning of this process and open the ERRORLOG file:
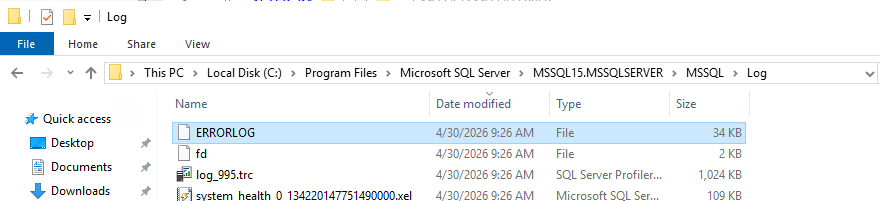
Open this one (it’s a text file so notepad is fine) and scroll to the bottom. It tells you exactly what the problem is:

In this instance, there was an access denied error (intentional for this demo, promise 😊) which I fixed by giving permission to the SQL Server service account to those individual files. We don’t have enough space in this blog post to be able to explain every problem you may encounter, but you’re a grown up, you can work it out (or go use your Google fingers furiously like the rest of us).
Final Checks
Let’s run our original script to find the locations of our system database files (your query window will ask you to reconnect to the server, this is just because we’ve restarted it).
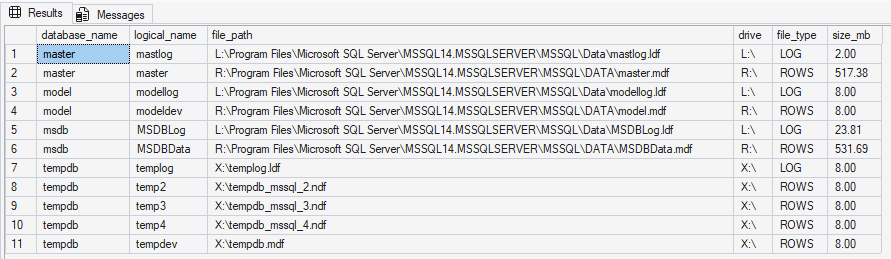
Happy with these file locations? Great! You have a job well done, be proud of yourself!
Now, go tell your boss how good you are at your job and go for a lay down while your heart rate returns to normal.





This Post Has One Comment
Pingback: Moving System Databases in SQL Server – Curated SQL
Comments are closed.